WooHoo - Modish News, Magazine and Blog Theme
News Theme, Magazine Theme, Blog Theme, This is WooHoo!.
News Theme, Magazine Theme, Blog Theme, This is WooHoo!.
Download the zipped theme pack to your local computer from themeforest and extract the ZIP file contents to a folder on your local computer.
Step 1 – Navigate to Appearance > Themes.
Step 2 – Click Install Themes and hit the upload button.
Step 3 – Navigate to find the “woohoo.zip” file on your computer and click “Install Now”
Step 4 – Once uploaded, activate the theme. Go to Appearance > Themes and activate it.
Download the zipped theme pack to your local computer from themeforest and extract the ZIP file contents to a folder on your local computer.
Step 1 – Log into your hosting space via an FTP software
Step 2 – Unzip the woohoo.zip file and ONLY use the extracted Woohoo theme folder
Step 3 – Upload the extracted woohoo theme folder into wp-content > themes folder
Step 4 – Activate the newly installed theme. Go to Appearance > Themes and activate it.
Envato have developed the Envato Toolkit Plugin for WordPress. You can use this to receive notification of updates to themes purchased from ThemeForest and to automatically update (upon clicking) directly from within your WordPress admin area.
Download the plugin zip file to your computer.
Step 1 – Unzip the package and locate woohoo.zip in the theme folder.
Step 2 – Go to Appearance > Themes and activate another theme such as the default WordPress theme.
Step 3 – Delete the Woohoo theme which is now inactive.
Step 4 – Go to Install Themes > Upload then install and activate woohoo.zip from the new package.
Download the zipped theme pack to your local computer from themeforest and extract the ZIP file contents to a folder on your local computer.
Step 1 – Unzip the package and locate Woohoo.zip in the theme folder.
Step 2 – Go to Appearance > Themes and activate another theme such as the default WordPress theme.
Step 3 – Delete the Woohoo theme which is now inactive.
Step 4 – Go to Install Themes > Upload then install and activate woohoo.zip from the new package.
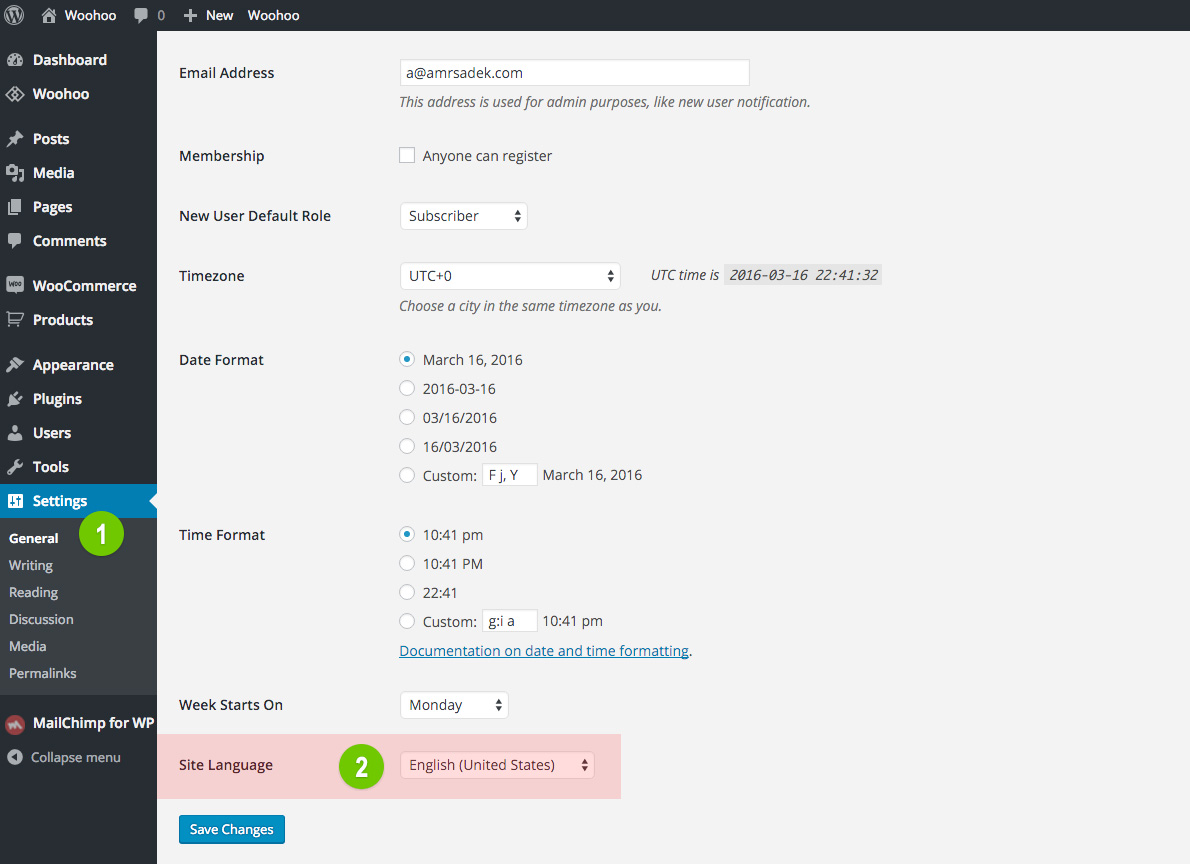
Step 1 – Go to ( WordPress Dashboard > Settings > General )
Step 2 – Select your website langauge
Step 3 – Connect to your site -> open (wp-content/themes/woohoo/languages) directory
Step 4 – Download the en_US.po file and open it with POEDIT.
Step 5 – Translate file and save it as ar_EG for example, you must name this file with your language code, check the full list here
Step 6 – Two files will be generated after save. ar_EG.po and ar_EG.mo
Step 7 – Upload the .mo and .po files into (wp-content/themes/woohoo/languages) directory
You just need to install the theme on RTL wordpress blog and it will adjust automatically .. check this page for more informations .
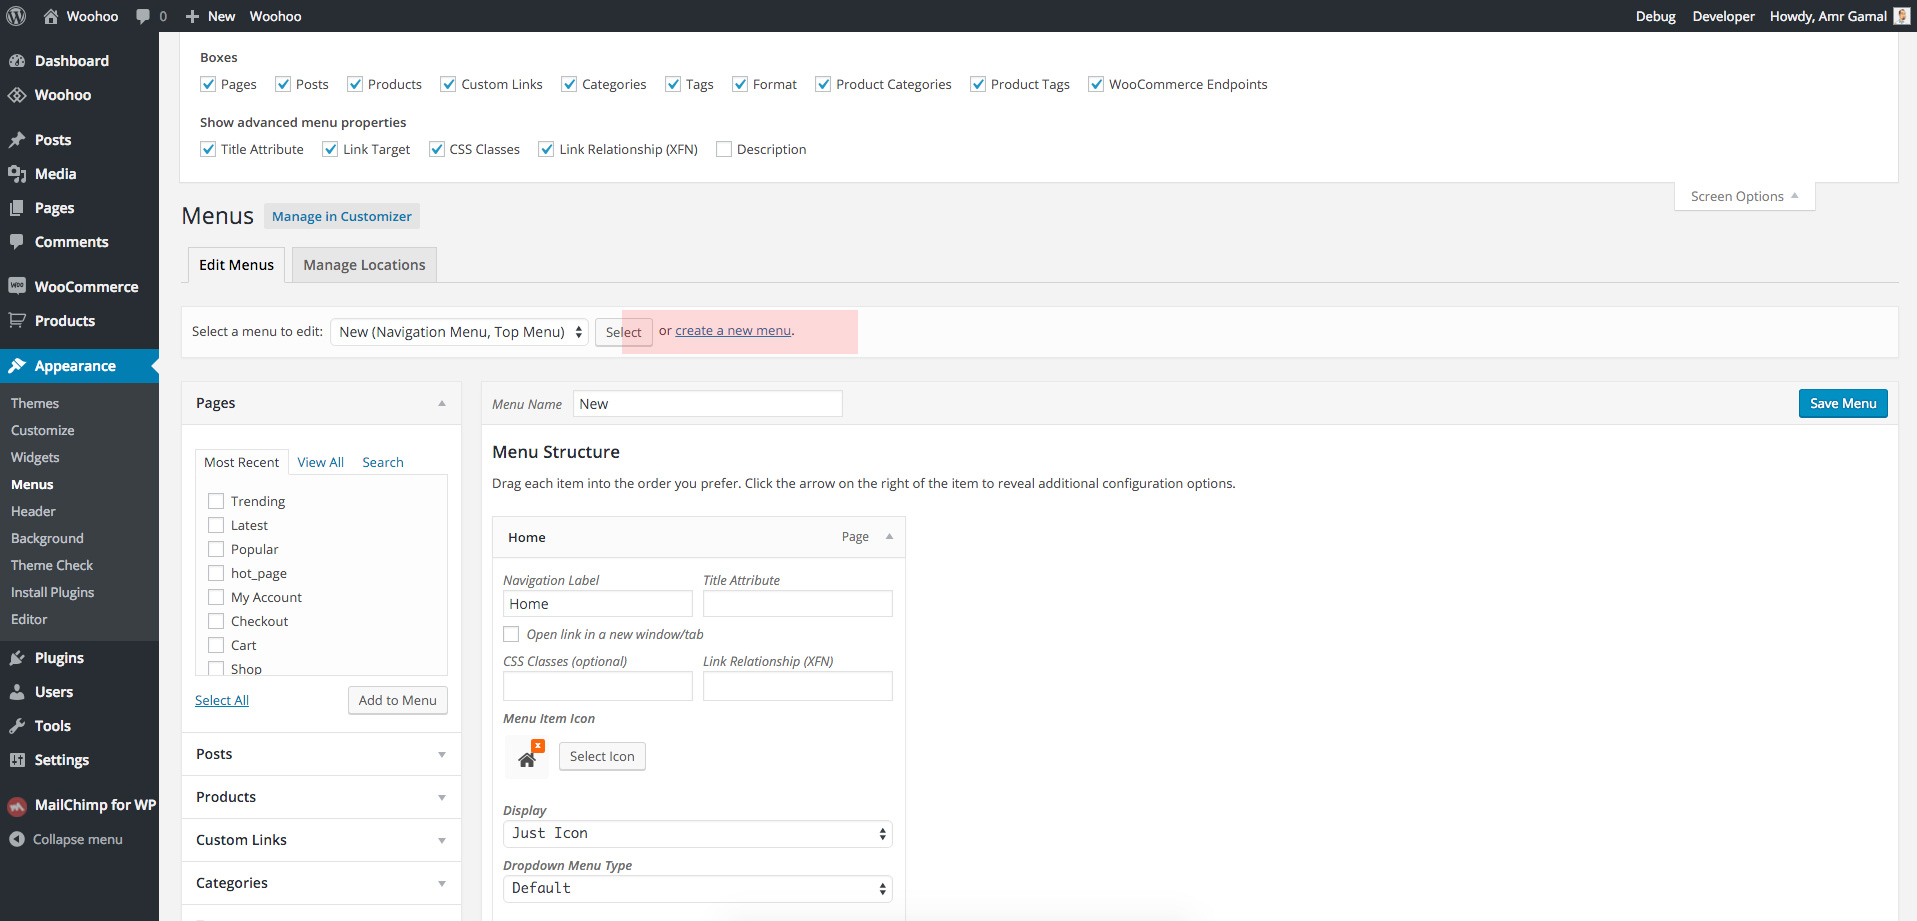
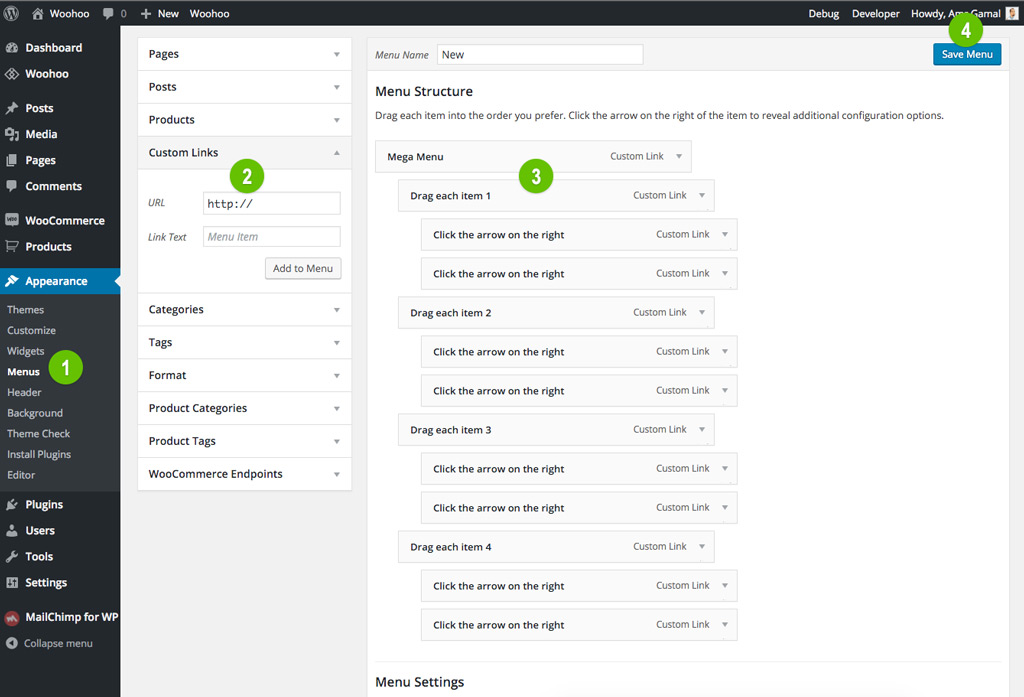
To create a custom navigation menu
Step 0 – Go to Appearance > Menu
Step 1 – Click on "create a new menu" to create a new menu (eg. Main Menu).
Step 2 – Add the menu items from the left panels
Step 3 – To create dropdown menu: drag the menu item toward the right (the item(s) will be indented)
Step 4 – When you are done adding the menu items, click "Save Menu"
To assign menu locations
Step 0 – Scroll down to the bottom where it says "Theme locations" and tick the menu location checkbox
Step 1 – Navigation Menu = main menu in the header
Step 2 – Top menu = top menu in the header
Tips: the custom menu can also be used with the widget ( GO to Appearance > Widgets and drop in the Custom Menu widget ). You may create additional menus by clicking the "create a new menu" link.
The "Custom Links" panel allows you to add menu link to external URL. For example you can create a link to Bdayh by entering:
Step 0 – URL = http://bdayh.com
Step 1 – Label = Bdayh
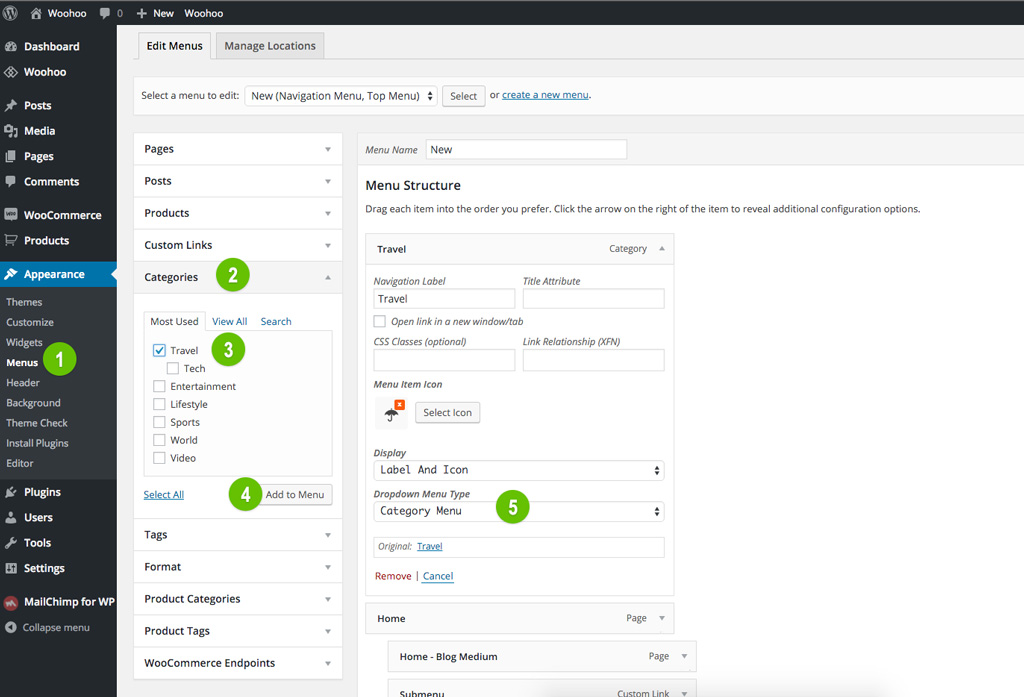
MegaMenu with sub-categories
Step 0 – Go to Appearance > Menu
Step 1 – Add a category in your menu and select a Category menu from here
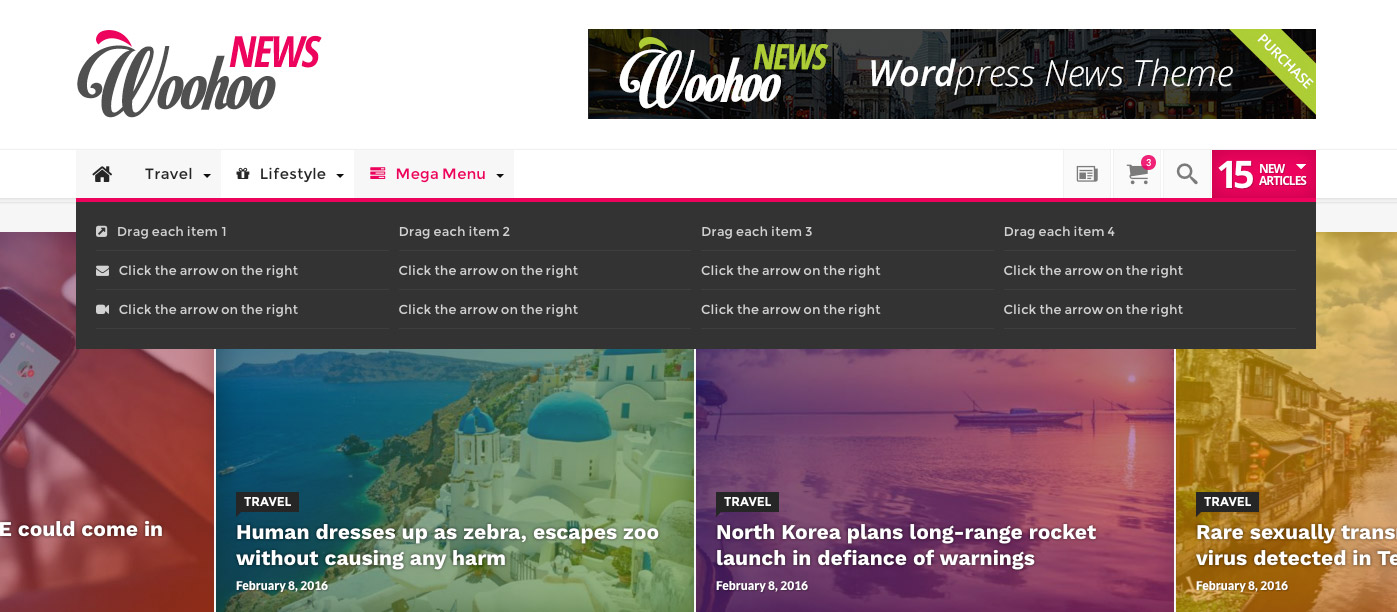
MegaMenu with Lists
Step 0 – Go to Appearance > Menu
Step 1 – Check From here
Go to Appearance > Menu > Custom Link > Select icon
AND Choose Icon Display (Just Icon - Lable And Icon - Just Lable)
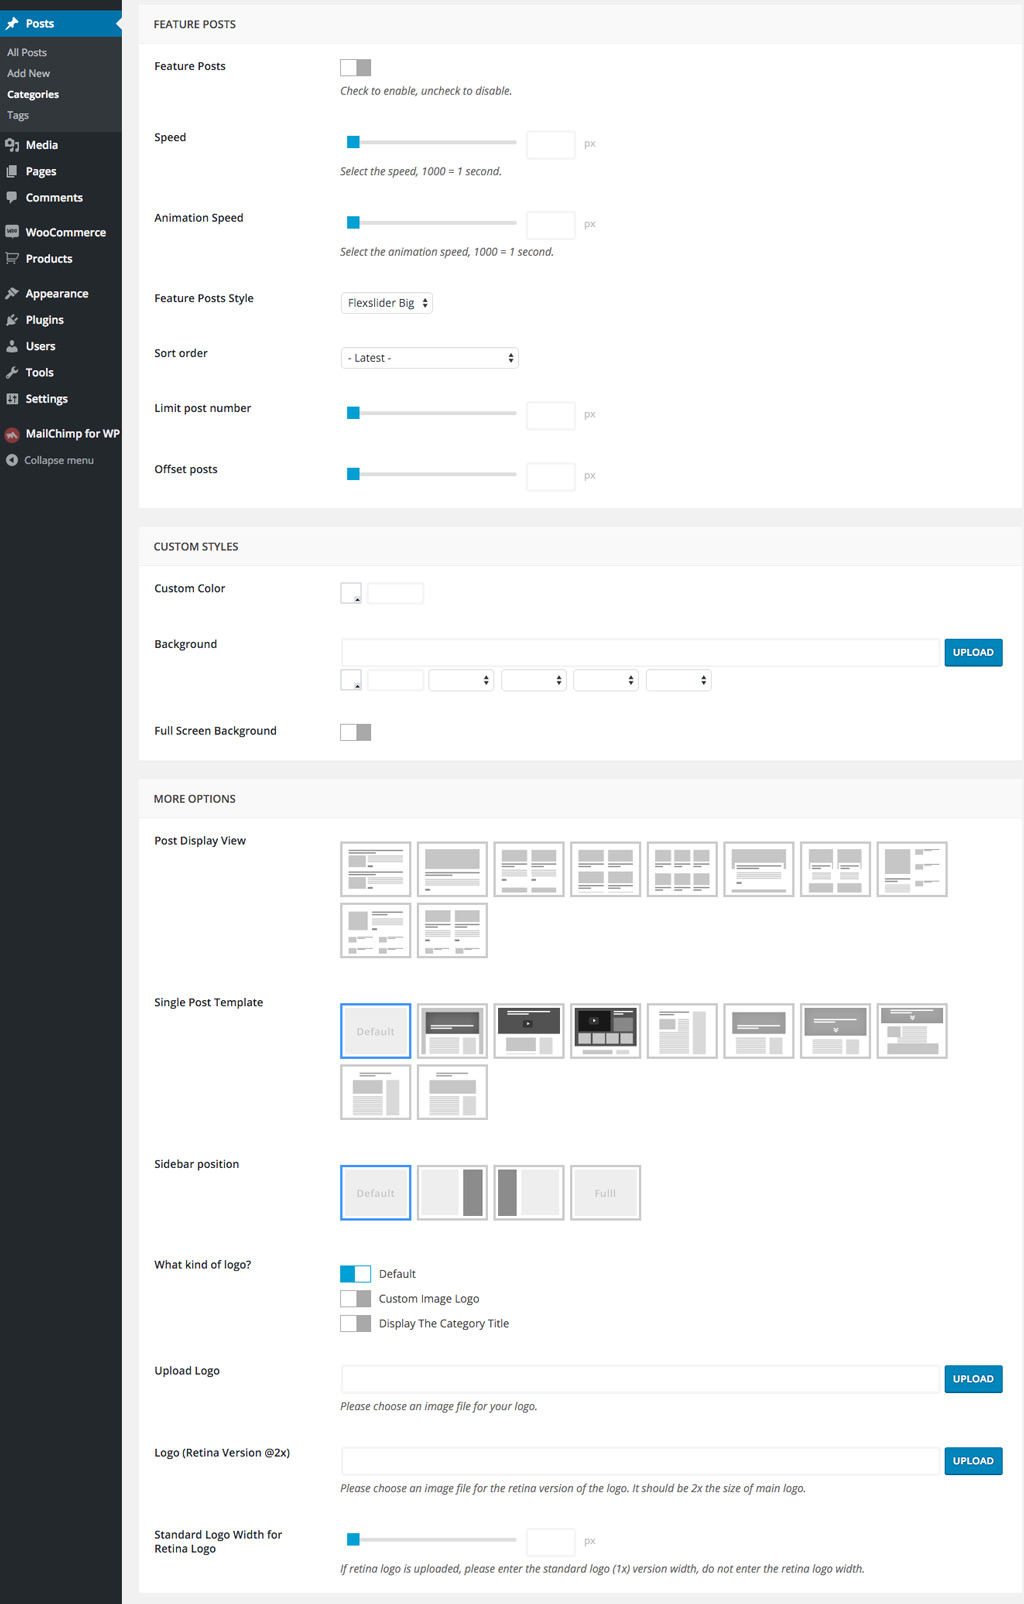
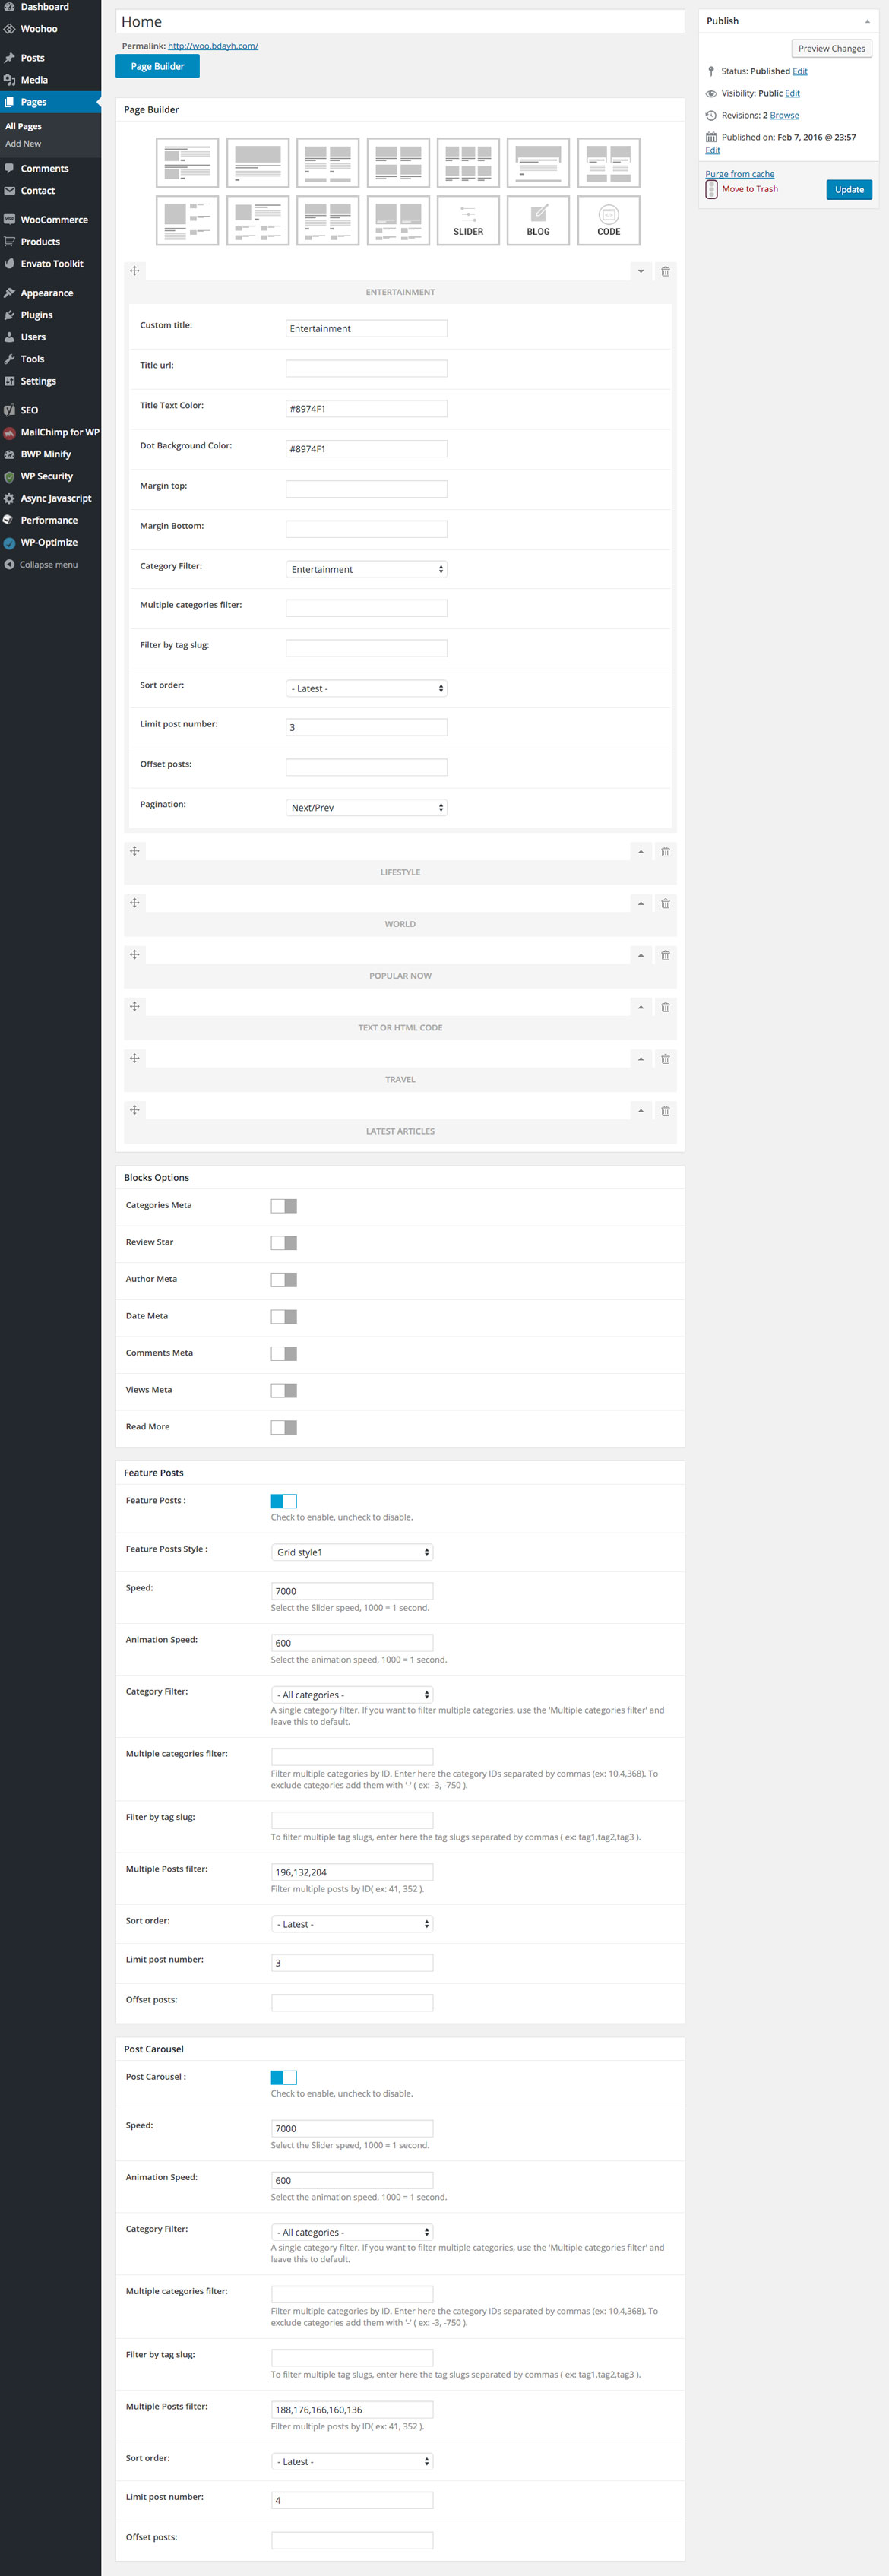
All of your posts must have a featured images .. these images will appears in the slider , homepage , sidebar .. etc
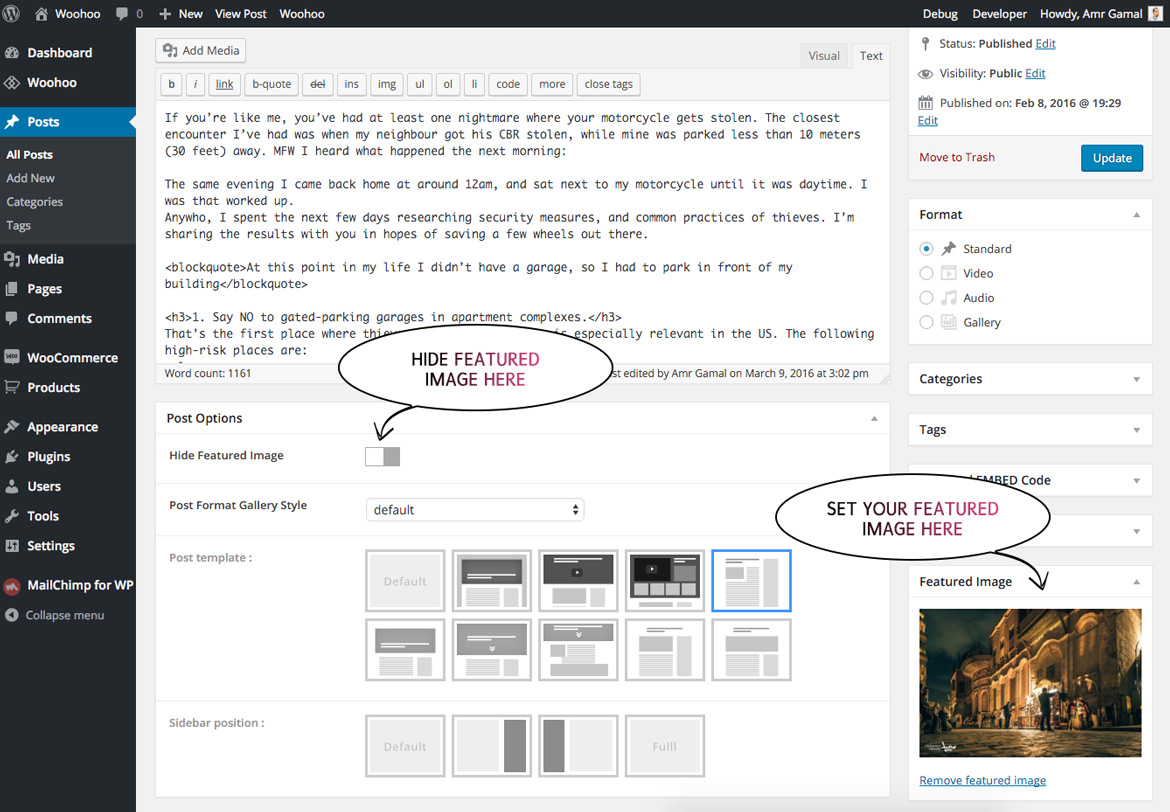
To set a Featured Image for your post just upload an image in the featured image post box.
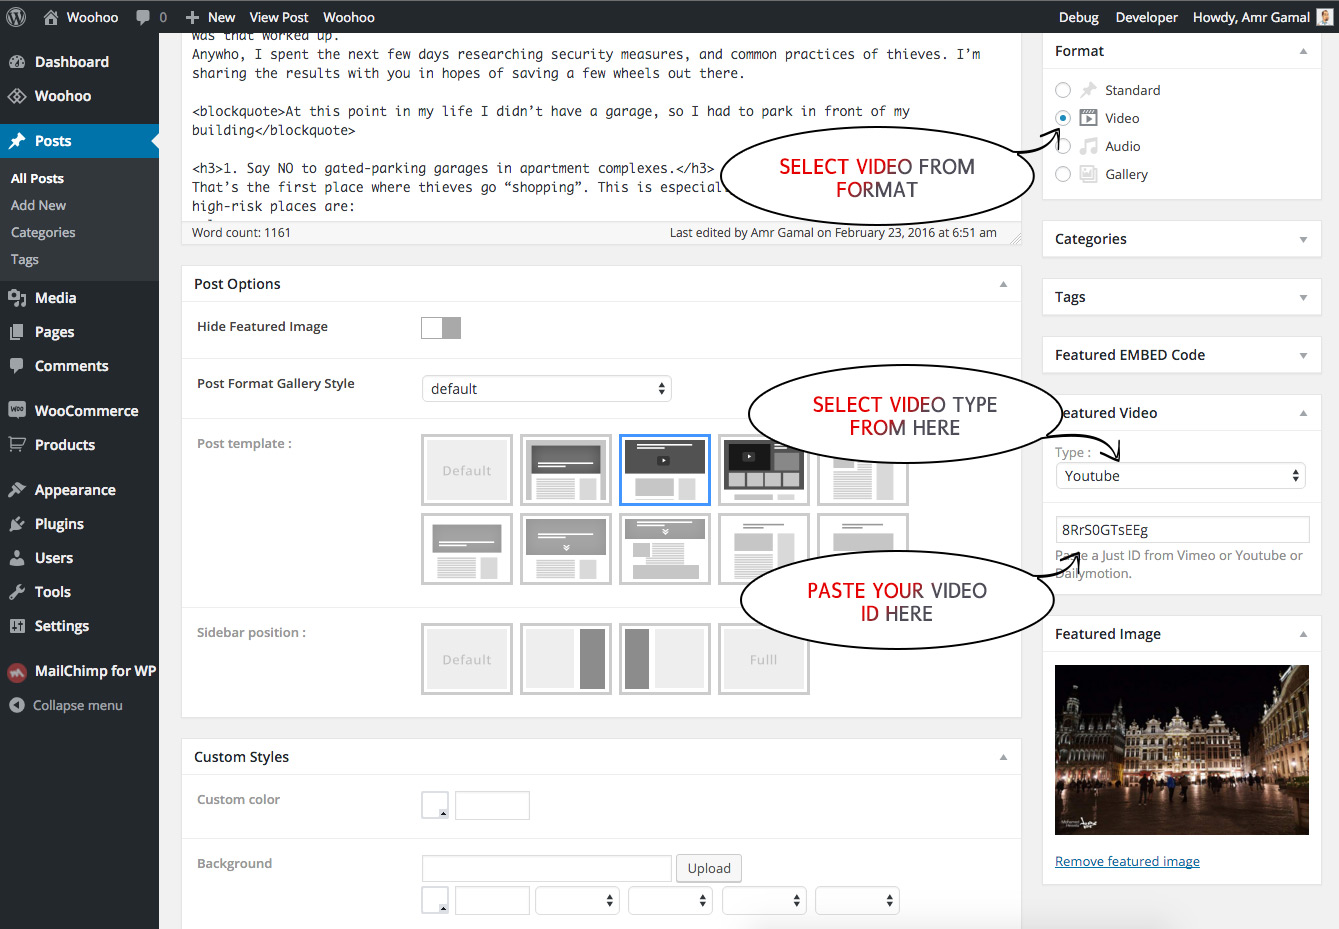
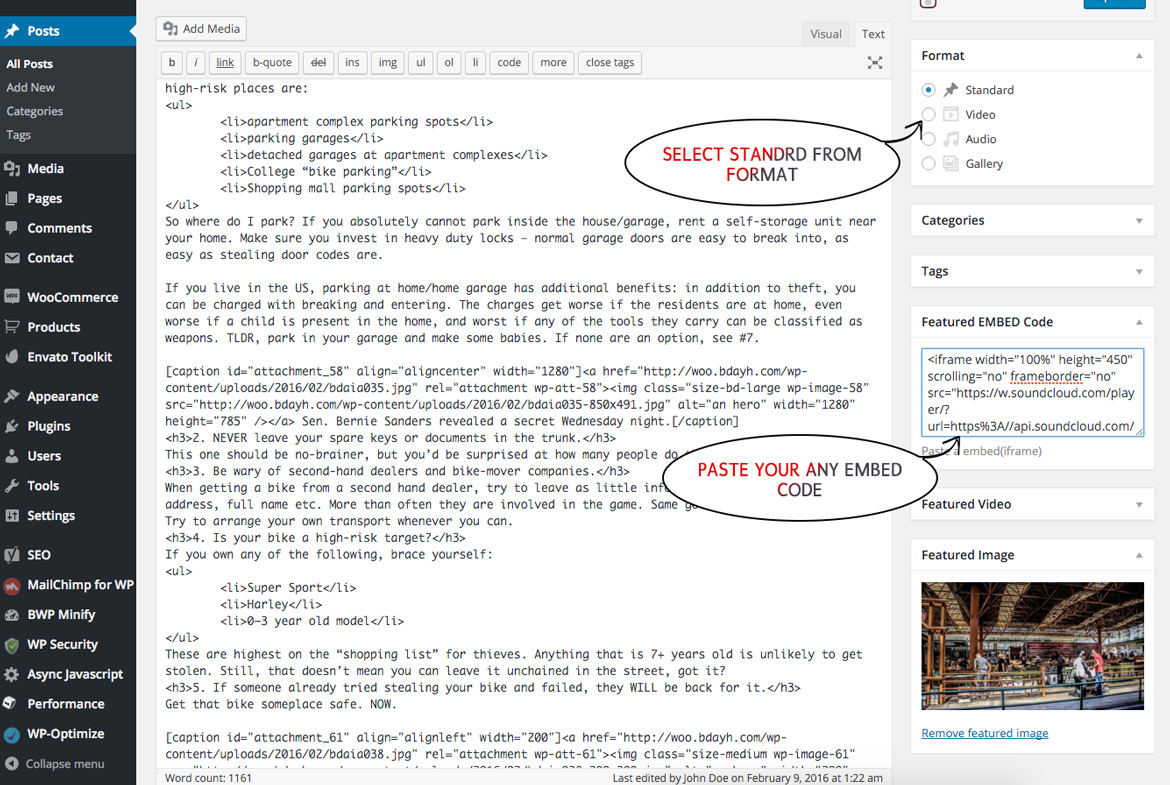
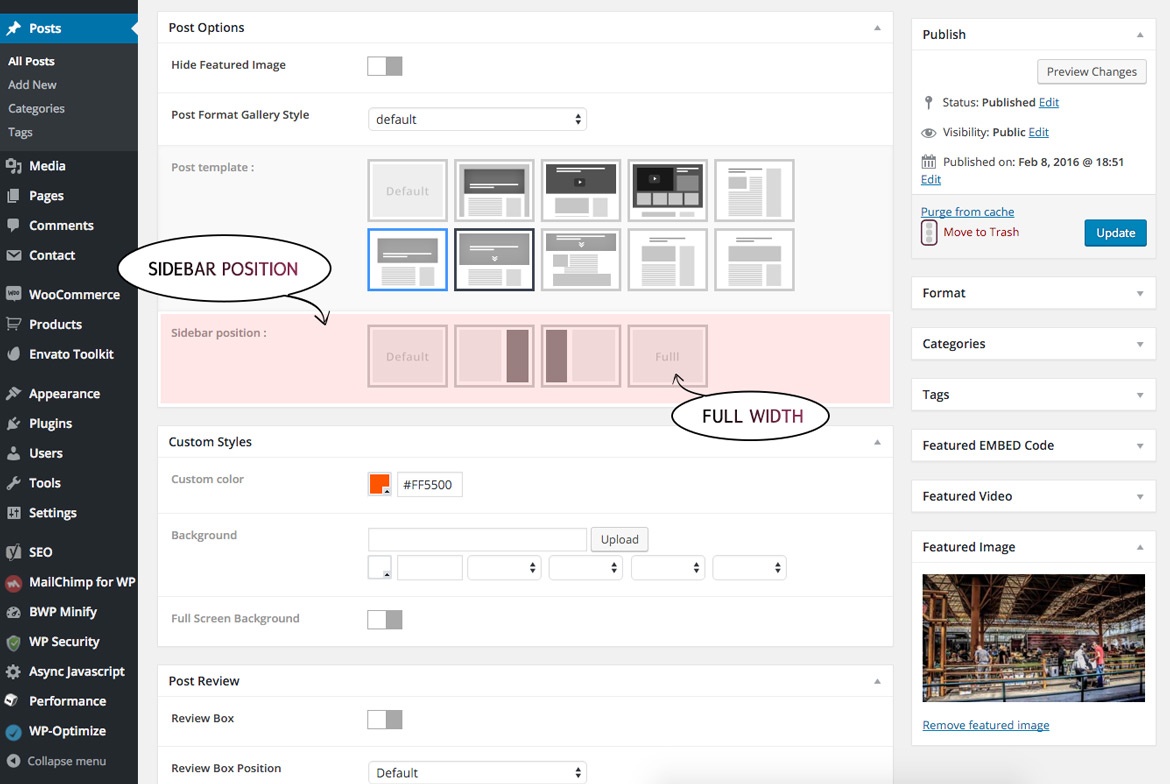
In post edit page , Select full Width image from Sidebar Position As shown in below screenshot:
Minification refers to the process of removing unnecessary or redundant data without affecting how the resource is processed by the browser - e.g. code comments and formatting, removing unused code, using shorter variable and function names, and so on
Use plugins :
Optimizing your images will helps your WordPress site load faster.
Download and activate WP Smush.it This plugin will optimize every image you upload and you can use the Bulk Smush.it feature to smush all of your uploaded images.
Alternatives to WP Smush.it include EWWW Image Optimizer, CW Image Optimizer, Imsanity and Hammy. Many WordPress users prefer using these plugins as they do not rely on an external server to process your images.
All modern browsers support and automatically negotiate gzip compression for all HTTP requests. Enabling gzip compression can reduce the size of the transferred response by up to 90%, which can significantly reduce the amount of time to download the resource, reduce data usage for the client, and improve the time to first render of your pages.
To enable gzip compression add the following lines to your .htaccess file:
    # Compress HTML, CSS, JavaScript, Text, XML and fonts
    AddOutputFilterByType DEFLATE application/javascript
    AddOutputFilterByType DEFLATE application/rss+xml
    AddOutputFilterByType DEFLATE application/vnd.ms-fontobject
    AddOutputFilterByType DEFLATE application/x-font
    AddOutputFilterByType DEFLATE application/x-font-opentype
    AddOutputFilterByType DEFLATE application/x-font-otf
    AddOutputFilterByType DEFLATE application/x-font-truetype
    AddOutputFilterByType DEFLATE application/x-font-ttf
    AddOutputFilterByType DEFLATE application/x-javascript
    AddOutputFilterByType DEFLATE application/xhtml+xml
    AddOutputFilterByType DEFLATE application/xml
    AddOutputFilterByType DEFLATE font/opentype
    AddOutputFilterByType DEFLATE font/otf
    AddOutputFilterByType DEFLATE font/ttf
    AddOutputFilterByType DEFLATE image/svg+xml
    AddOutputFilterByType DEFLATE image/x-icon
    AddOutputFilterByType DEFLATE text/css
    AddOutputFilterByType DEFLATE text/html
    AddOutputFilterByType DEFLATE text/javascript
    AddOutputFilterByType DEFLATE text/plain
    AddOutputFilterByType DEFLATE text/xml

    # Remove browser bugs (only needed for really old browsers)
    BrowserMatch ^Mozilla/4 gzip-only-text/html
    BrowserMatch ^Mozilla/4\.0[678] no-gzip
    BrowserMatch \bMSIE !no-gzip !gzip-only-text/html
    Header append Vary User-Agent
When a web browser displays your webpage it has to load several things like your logo, your CSS file, and other resources. What browser caching does is "remember" the resources that the browser has already loaded. When a visitor goes to another page on your website your logo or CSS file does not need to be loaded again, because the browser has them "remembered". The end result is that your pages load much faster.
To enable browser caching add the following lines to your .htaccess file:
    ## EXPIRES CACHING ##

    ExpiresActive On
    ExpiresByType image/jpg "access 1 year"
    ExpiresByType image/jpeg "access 1 year"
    ExpiresByType image/gif "access 1 year"
    ExpiresByType image/png "access 1 year"
    ExpiresByType text/css "access 1 month"
    ExpiresByType text/html "access 1 month"
    ExpiresByType application/pdf "access 1 month"
    ExpiresByType text/x-javascript "access 1 month"
    ExpiresByType application/x-shockwave-flash "access 1 month"
    ExpiresByType image/x-icon "access 1 year"
    ExpiresDefault "access 1 month"

    ## EXPIRES CACHING ##
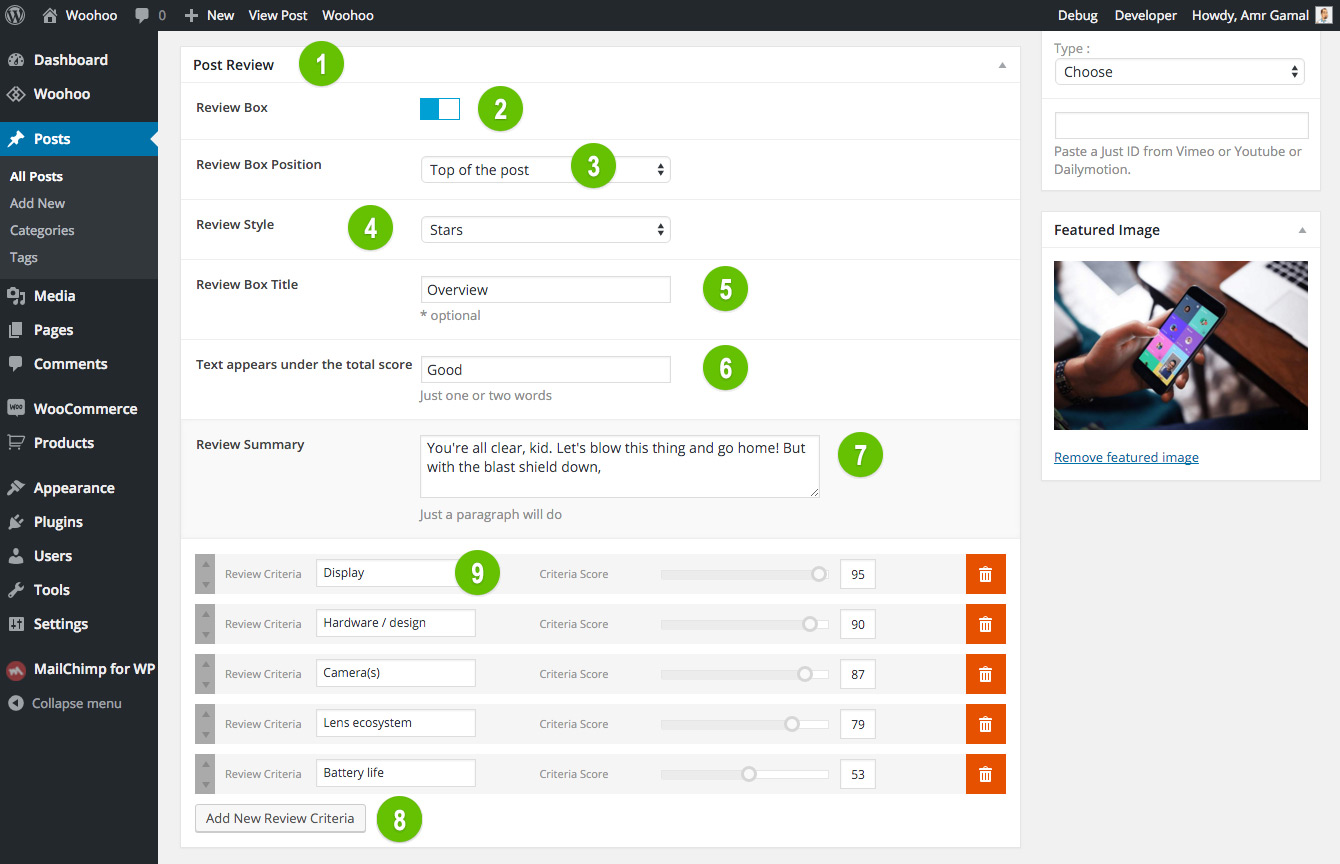
One of great features of Woohoo is that you can make an online shop with it.
Woohoo is fully compatible with latest version of Woocommerce Plugin. We added required stylings to fit the design, and all required confiq codes to make it seamless with Woohoo. If you dont need Woocommerce simply dont install it and all the features, codes and anything required for woocommerce will not be loaded and interfered. Vice versa, if you need to set up woocommerce just install woocommerce like you do for other plugins and thats all about it. you dont need to do anything else.